まず、Three.jsを読み込みます。
手っ取り早くCDNを利用する場合はこちら
<script src="https://cdnjs.cloudflare.com/ajax/libs/three.js/r124/three.min.js"></script>https://threejs.org/こちらからDLしてもよいです。
そして以下のようなJSを記述します。
window.addEventListener("DOMContentLoaded", init);
function init() {
const width = 300;
const height = 250;
// 描画(レンダー)を作成
const renderer = new THREE.WebGLRenderer({
canvas: document.querySelector("#demo_canvas")
});
//解像度をデバイスにあわす
renderer.setPixelRatio(window.devicePixelRatio);
//サイズをセットする
renderer.setSize(width, height);
// シーンを作る
const scene = new THREE.Scene();
// カメラの種類の指定 これは遠近方を効かすカメラ
const camera = new THREE.PerspectiveCamera(
45,
width / height,
1,
10000
);
//カメラの位置
camera.position.set(0, 0, +1000);
// 形状を決める これは箱を作っている
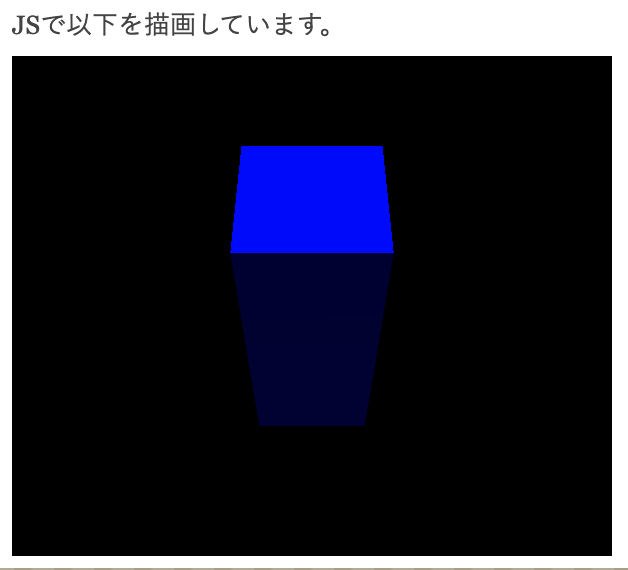
const geometry = new THREE.BoxGeometry(200, 200, 500);
// 材質を決める これはスタンダートなやつ
const material = new THREE.MeshStandardMaterial({
color: 0x0000ff
});
const box = new THREE.Mesh(geometry, material);
// シーンに追加
scene.add(box);
// 光を当てる DirectionalLightは面で降り注ぐ光
const light = new THREE.DirectionalLight(0xffffff);
light.intensity = 2; // 光の強さ
light.position.set(30, 10, 20);
// シーンに追加
scene.add(light);
// 実行
tick();
function tick() {
//アニメーションの設定
requestAnimationFrame(tick);
// 箱を回転させる
box.rotation.x += 0.01;
// 描画する(レンダリング)
renderer.render(scene, camera);
}
}HTMLはこちら
<canvas id="demo_canvas"></canvas>JSで以下を描画しています。